
Ruched Headband Tutorial


Getting Started
Materials:
3'' X 15'' piece of felt
1 yard of lightweight fabric*
35'' bias (store bought or hand made)
Matching thread
Click on and print pattern piece at 137%--just the first page
*On fabric choice: I used some scraps of lining that worked wonderfully well, but experiment with what you have on hand. I also did some with sheer fabric which also worked nicely, but keep in mind the felt color will show through a sheer.


1 Cut out headband base out of felt on the fold
2 Cut a rectangle 30'' X 3'' (I used lining for this tutorial)


3 Fold fabric in half and cut 1/2'' off each side, tapering until 4'' from fold
4 Unfold and baste 2 rows down each side, one at 1/4'' and the other at 1/2''.
Do this by making the stitch on your machine as long as it will allow and
DO NOT backstitch, leaving your threads long on each end


5 Take the top two threads on each side and pull, working the fabric down the threads
6 Repeat on other side until the fabric is the length of the felt base
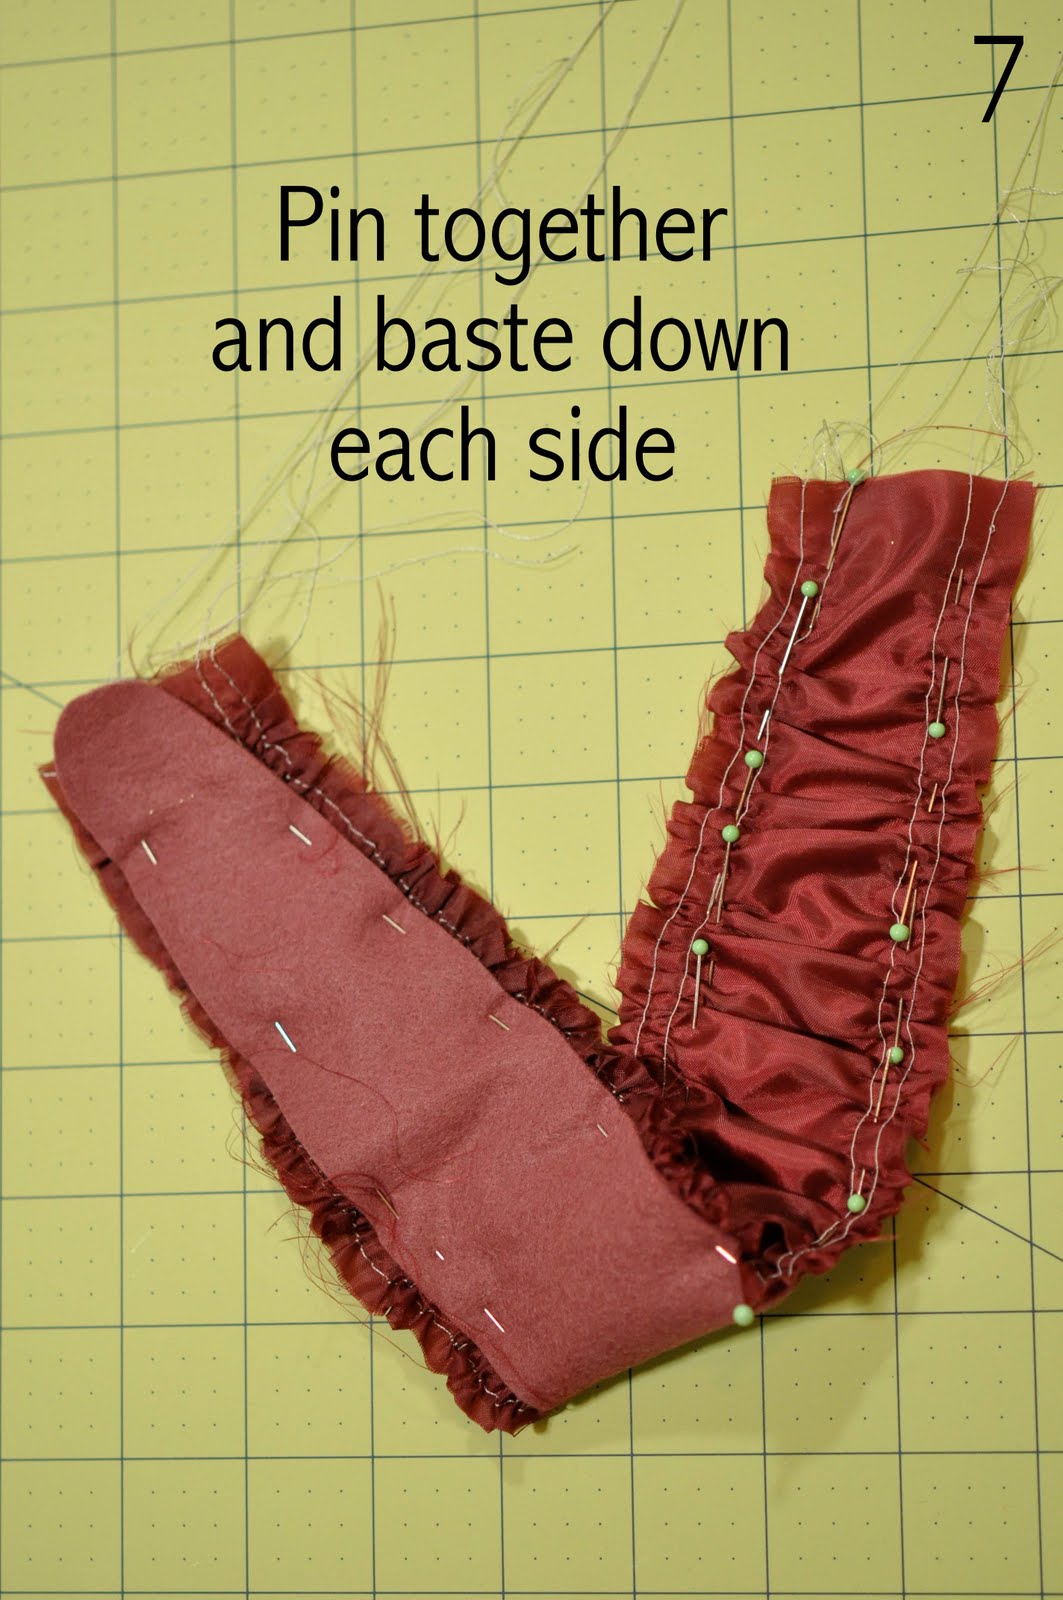

7 Pin fabric to felt and baste down each side. DO NOT backstitch
8 Remove the first set of basting stitches (see step 4) and trim excess fabric


*You can use store bought double folded bias, or you can make your own
9 Fold you fabric at a 45 degree angle and cut
10 Cut a strip 1 1/4'' wide
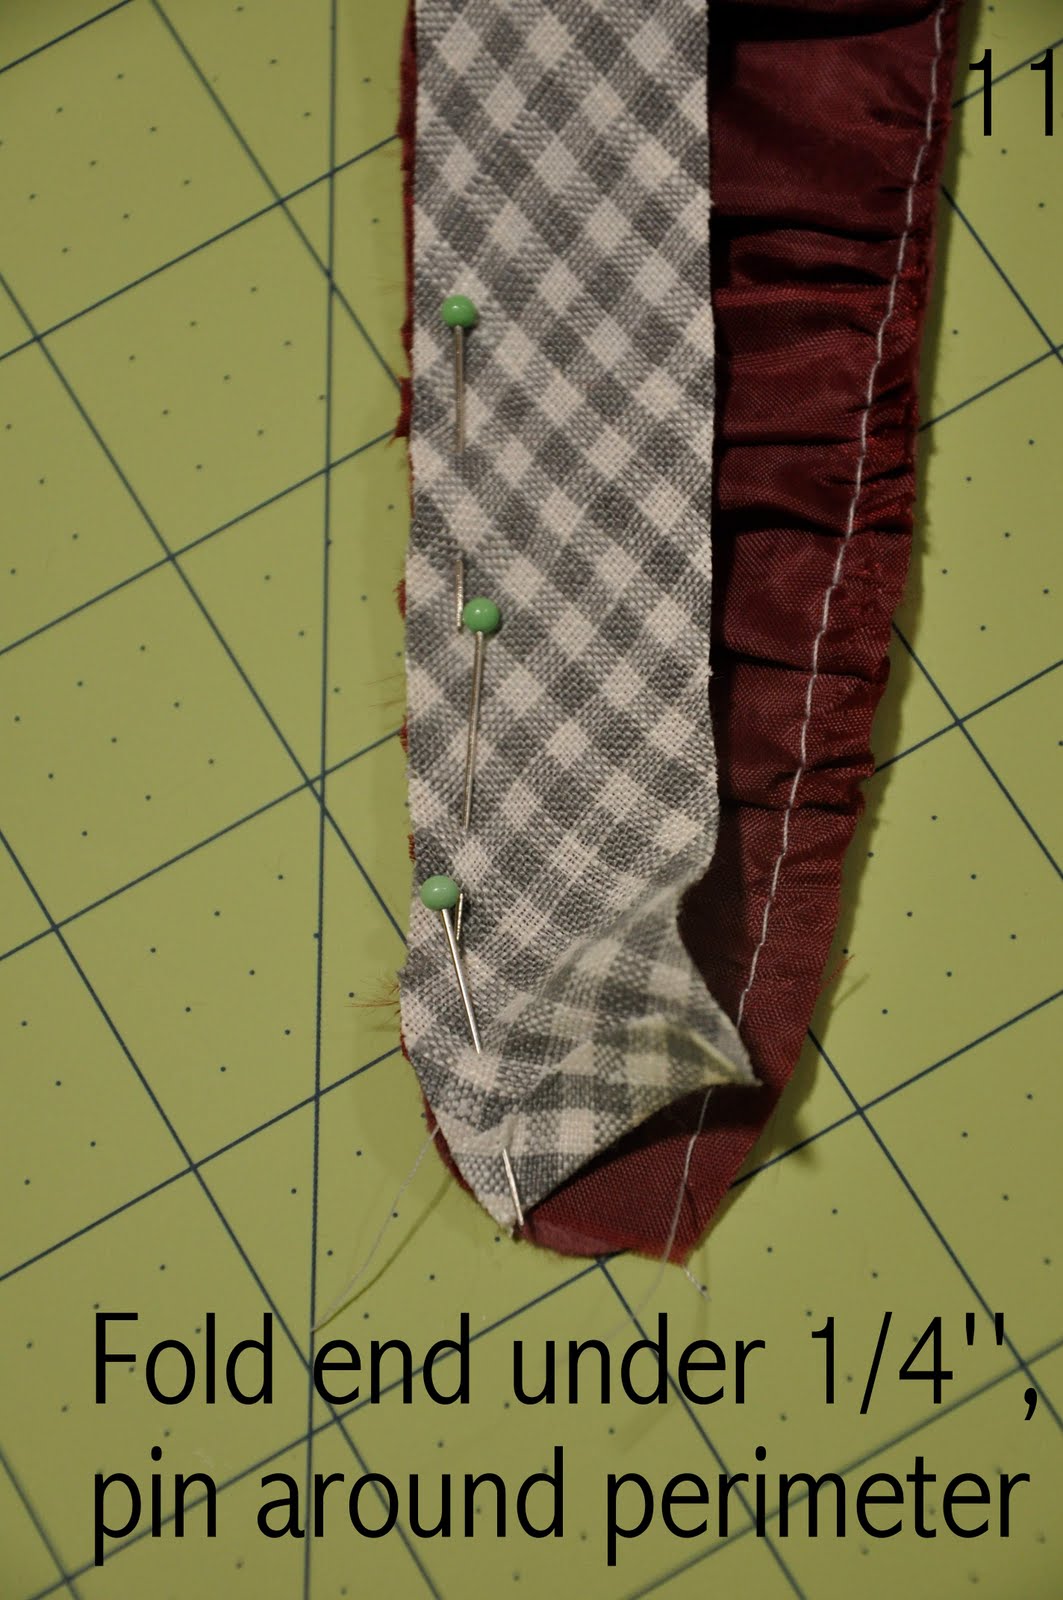

11 Fold end of bias back 1/4'' and pin around entire headband
12 Stitch, using a regular stitch 1/4'' backstitching when you stop and start


13 Fold bias under and pin. Stitch in place by hand on the back side, or use the machine
14 If you use the machine, edgestitch just on the inside of the bias


*For the tie you can use purchased ribbon, some lace,
or you can sew on a length of elastic
15 For the tie, cut a piece from the same fabric, 2 rectangles 27'' X 7''
16 Fold each strip in half and cut at an angle. Stitch angled edge and down the open edge 1/4'', leaving bottom edge open.
17 Trim point as pictured


18 Turn inside out using the woman-known put-on-panty-hose
method of gathering the material on your thumbs.
Before pulling the fabric down,
gently push out the point using a bone folder or tip of a pen lid
19 Turn open end in 1/4'', press and edgestitch

20 Attach ties by folding end into a "z", pin, and sew a semi-circle around each end


*This is an original design of Sew Apropos (of No Big Dill). Feel free to make these for personal use, but please do not mass produce and/or sell without contacting me to establish remuneration.
Gift presents: headband tutorial, sewing pattern
http://thedillspiel.blogspot.com


